


We are not out of March yet but already my greenhouse has readings of 115 degrees Fahrenheit (46 degrees Celsius), which means that without shading, my seedlings are pretty soon going to fry.
The most economical method is to paint on white shading which comes in pre-measured sachets (a box costs around 5 pounds). Credit crunch or no credit crunch, this all seems too much like hard work to me, specially the wiping off part at the end of the season.

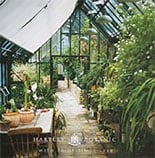
Some greenhouses come with built in shades (a good option to invest in when you make your initial purchase), but since mine doesn’t I’ve decided to opt for netting on the outside because I want to keep the inside clear for tall crops like cucumbers and melons.
In most cases running the netting along one side is sufficient (my greenhouse runs East/West, so I will be shading the south side).
The other thing I’ve noticed is the amount of watering I’m now having to do. In addition to seedlings I’ve been starting off dahlia tubers in pots as well as gladioli and lilies. All this is taking up two to three big watering cans a day, so the other thing I’ve done is to run a hose (buried in the ground) from the outdoor tap, (don’t forget to use a double connector on the tap). I now have water at the greenhouse door which makes a huge difference. I also keep a bucket of water in the greenhouse at all times so that it’s at ambient temperature – remember that young plants and seedlings can easily suffer ‘root shock’ if you water them with very cold water, as it sometimes can be on a chilly day.
Essentially I now have 3 separate ‘temperate zones’ in the greenhouse. The Vitopod propagator with lid is the warmest. When the seedlings have emerged and are a few centimetres high, I transfer them to the bench which has a heated electric blanket. After a couple of weeks on this they are moved to the bench on the other side which has no heating at all, but benefits from the overall effect of a heated greenhouse. After observing your thermometer every day, you will soon get a sense of what 50 degrees Fahrenheit (10 degrees Celsius) feels like. This is what might be called a ‘cool’ rather than an ‘unheated’ greenhouse. Once you are familiar with this benchmark temperature you will be able to instantly recognise if the greenhouse feels colder than usual when you set the heater in the evening.
The next stage will be to ‘harden off the plants’. Since I don’t have the space for cold frames I’ll do this in a temporary plastic mini-greenhouse.
I’ve chosen dark, moody colours for this years’ borders (dahlia Dark Stranger, Western Pirate and Ambition, along with Gladiolus ‘Espresso’) to go with dark blues of larkspur, salpiglosis and amberboa and a spot of orange. Since the bulbs and tubers are plants that provide an explosion of colour and drama, the plan is to sink them in to the border in pots wherever they are most needed then whip them out once they have flowered so that something else can go in.
All we need now is a hot summer.
There is still time to plant your parsnips. Start them off in the greenhouse on wet kitchen roll between two plastic food trays or plastic coated picnic plates. Once they have germinated (it takes about 2 weeks) plant them into a hole that you have dug out first into the shape of an ice cream cone. Take the soil out of the hole and fill it with crumbled compost so that the root will have no stones or hard ground to fight its way through.
We dug up the last of our parsnips over the weekend.

Next time I’ll show you how to grow your own Christmas dinner using the greenhouse (just add turkey!)