


The media buzz about bee conservation is having a real effect, but virtual gardening only goes so far – and there are more immediate ways of boosting bee populations.
During the last year I seem to have spent a lot of time tapping my computer keyboard to help improve the lot of bees, large and small – signing a petition here, retweeting a link to yet another campaign there, nudging my MP when needed. These wonderful, beneficial and utterly beguiling insects have rarely been out of the news, such are the mounting, human-driven threats to their future existence: loss of the wild, unkempt places where they live, ever-intensifying farming and horticultural methods (including the use of silent but deadly pesticides such as neonicotinoids) and jumbled, misfiring seasons due to our changing climate.
Although this virtual petitioning and digital information-sharing is vital and unquestionably invaluable in influencing anything from government policy to a change of mind, its results happen down the line and far away. We shouldn’t give up on the coaxing and lobbying on behalf of bees (or the rest of nature), but I’ve decided that the best way to bump up my own bee-boosting efforts this spring is actually to give the keyboard a well-earned rest. I want to do something positive for bees that happens right here at my end of the ‘line’, something I can plan, touch, admire and, above all, make happen myself – all without spending a penny.
You can spend far more than a penny if you’re lured by the proliferation of bee and insect ‘homes’ on sale. They are intended to provide somewhere for smaller ‘solitary’ bees and other insects, such as the smaller wasps, to make their nests, but some of these well-meant ‘bug hotels’ are unlikely to have any invertebrate checking in soon. Many fail to attract visitors because their ‘rooms’ are simply too big and/or badly designed. Their tariff can be off-putting too, not to mention the fact that many have been manufactured en masse in faraway lands. Even the bee-friendly products which do work come at a price. My bee-boosters won’t cost you anything, but I’m hoping they’ll turn out to be priceless in terms of coaxing more solitary bees to hang around in your garden. You will need to invest a little time in making them, but they’ll last for yonks, and it trumps sitting at a keyboard any day.
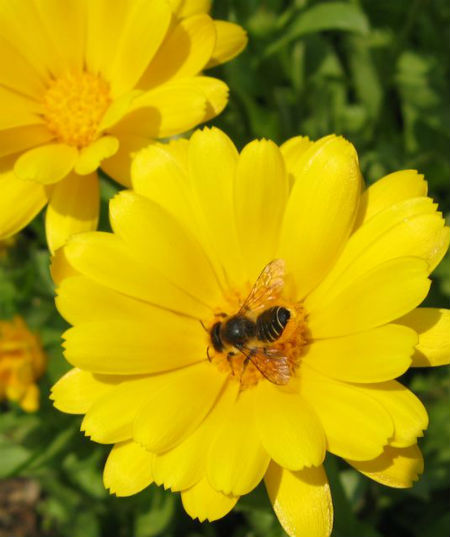
Both of my home-made bee-boosters are intended to give both solitary bees – including leafcutter (Megachile spp.) and mason bees (Osmia spp.) – and solitary wasps somewhere to build their nests. Solitary bees are smaller, quieter and less conspicuous than bumble or honey bees, but are important pollinators of garden crops, especially fruit. As their name suggests, they do their living solo, and don’t form colonies. Solitary wasps are also less noticed than their larger, irascible cousins, but they do a grand job for gardeners by catching and paralysing aphids, caterpillars and other plant pests, which they feed to their offspring. Several solitary bees and wasps make their nests in hollow plant stems, and in holes in dead wood. My bee-boosters use simple, found materials to create accommodation that I’m hoping will prove irresistible…
Canned bees (and wasps)
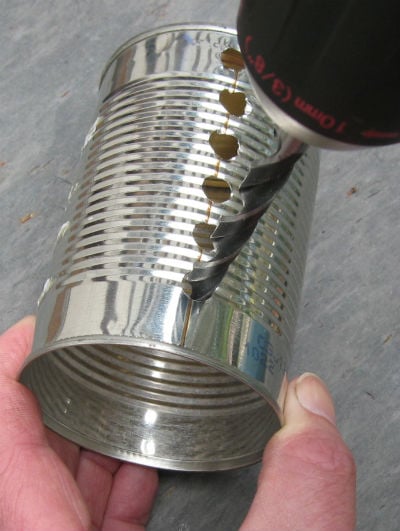 1 Once you’ve enjoyed baked beans on toast, wash the can out and turn it into a bee-booster (cans with pull-off lids work best as these don’t leave a sharp edge). Carefully drill a row of 13mm (1/2in) diameter holes down one side; these will sit at the bottom of the bee-booster and let any water drain out. Use a sharp drill bit, and flatten or smooth off any sharp edges.
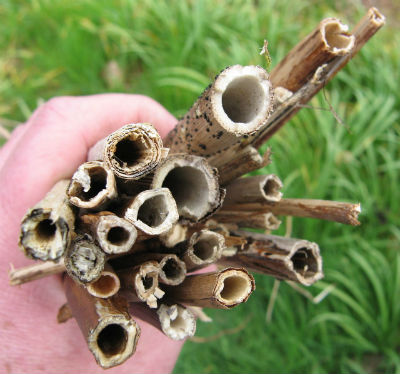 2 Enjoy a wander around your garden (or along a lane) and collect as many dead and hollow plant stems as you can find. You need stems in all sizes with holes from around 4mm (1/8in) up to 13mm (1/2in) in diameter. The stems must be dry, hollow and smooth on the inside. I gathered up Japanese knotweed (dead), stinging nettle, foxglove, hogweed and Iris sibirica, in 10 minutes.
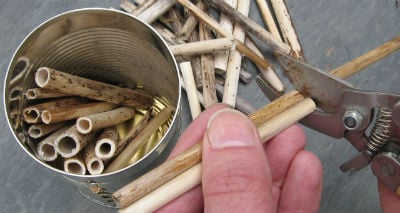 3 Now comes the therapeutic part. Snip off a ‘master’ stem to a length that will sit 13mm (1/2in) inside the can’s rim. Use snippers (or scissors) to cut your haul of dry stems into identical lengths – mine were 10cm (4in). Aim for a mix of different diameter holes; different species of bees and wasps will each pick the best size for them to use. Each stem must be hollow; hold it up and check for light at the other end.
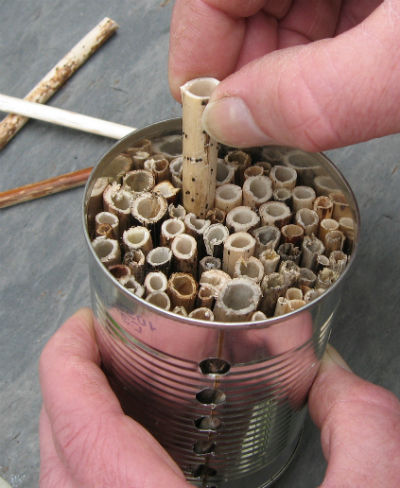 4 When you’ve snipped a sufficient amount, fill the can up with the stems, in a random, higgledy-piggledy pattern. The stems need to fit tightly in the can to stop them falling out (and to deter blue tits from pulling them free), so ease some of the stiffer and thinner shoots into any gaps as the can fills up. Packed tight, the stems should stay put when the can’s turned upside down.
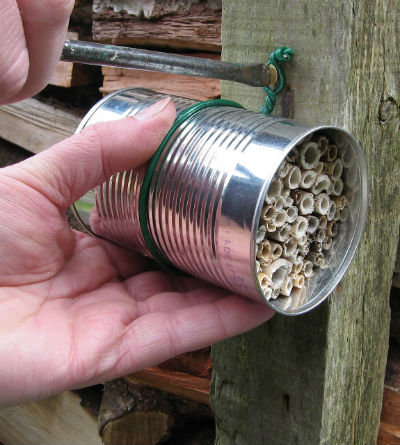 5 Location is everything: your bee-booster needs to be in an open, sunny spot which isn’t shaded by plants, about 1m (3ft) from the ground. I used a length of wire around the can, looped at the end, which I screwed to the frame of my log store. The drainage holes should be at the base of the can. The fixing must be secure – the can shouldn’t flap and move about in the wind.
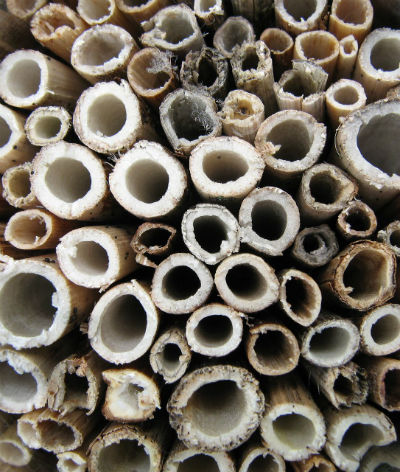 6 All you can do now is wait for guests. Nesting bees and wasps lay their eggs next to a food store inside the stems. Once a stem is ‘full’, its entrance will be sealed with a plug of ‘mortar’ (see below); leafcutter bees use fresh leaves. In winter, move the can to a dry, unheated garage or shed, then put it back outdoors the following spring, when adult bees/wasps will emerge from the stems.
Bee-rise block
 1 Wooden pallets aren’t just for making compost bins; the solid wooden blocks they contain can, with any nails removed, be turned into bee-boosters, as long as they are 10-15cm (4-6in) deep and not treated with preservative. Use sharp drill bits to drill a selection of smooth vertical holes, between 4mm (1/8in) and 13mm (1/2in) in diameter, randomly across one face of the block. Drill almost to the other side, but not right through the block.
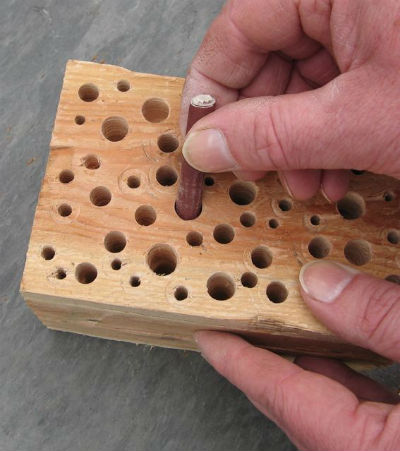 2 Give the holes a good clear-out by tapping the block to remove any sawdust (or use a vacuum cleaner). Solitary bees and wasps will be much more inclined to nest if the entrance holes are completely smooth; carefully shave off any splinters with a sharp penknife, and/or work a narrow roll of fine sandpaper around the inside edges of each hole – even the smallest ones – to smooth them off.
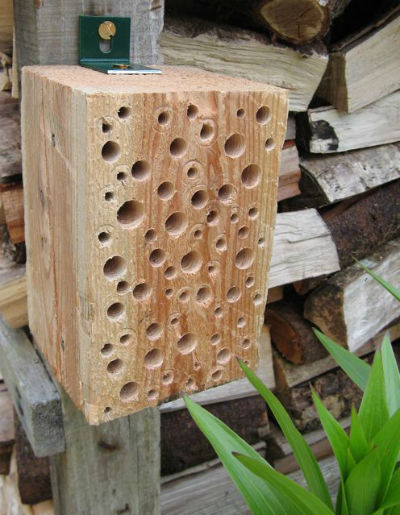 3 Your bee-boosting block needs to be in an open spot which is sunny for most of the day, and which won’t disappear under plants. I fixed mine to a wooden post using a small section of right-angled metal, so it’s 1m (3ft) above the ground. Blocks can be fixed to any sunny wall or fence, but no higher than 1.8m (6ft). A deluxe booster could be made with a sloping top to shed rain.
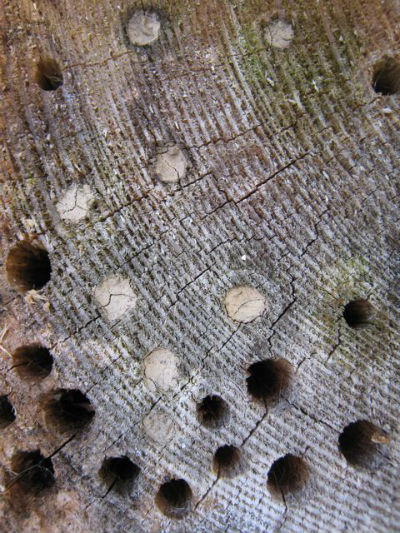 4 Unless you’re eagle-eyed, the first sign of take-up will be when you spot holes sealed with plugs of mortar-like mud (or cut leaves). Patience pays: bees and wasps might spend this spring/summer nest-hunting, but only move in next year, when the booster is more ‘weathered in’. Occupied blocks can be moved to a cold, dry place in winter to stop the seals washing away. Put them back outdoors in early spring.
Text and images © John Walker